Camera Placement Standard – Video Analytics
Camera Placement Standard – Video Analytics
Objective
This document explains the standard camera placement criteria required to achieve high-precision video analytics.
Following this standard enables high-precision analytics, aligned with the accuracy levels ensured by KSI VISION, reducing counting errors, minimizing occlusions, and ensuring consistent and auditable results.
👉 This document is a practical summary guide.
For full technical details, refer to the official standard documents.
Standard Scope
This standard applies to camera placement for:
- Perimeter entrances (people counting)
- Checkout, returns, and fitting room queues
- Internal commercial zones
- Multi-floor environments (stairs and elevators)
It includes criteria on:
- Mounting height
- Coverage radius
- Lens / field-of-view selection
- Occlusion management
- Lighting conditions
Step 1 – Preparation
Before defining any camera placement:
- Obtain the store or shopping center floor plans
- Identify the real ceiling height
- Define the camera mounting height
📌 In most cases, cameras are installed at ceiling height, especially in fisheye camera setups.

Step 2 – Define Points of Interest
On the floor plan, clearly mark all areas that require analytics:
- Store entrances
- Checkout and returns zones
- Fitting rooms
- Commercial zones
- Stairs or elevators (sometimes only one end needs to be monitored)
👉 These points define where effective coverage is required.

Step 3 – Coverage Radius Calculation
Recommended Method (KSI Standard)
The coverage radius must always be equal to the camera mounting height.
📐 Base rule
Coverage radius = Mounting height
Example:
- Mounting height: 4 m
- Recommended coverage radius: 4 m
📌 This rule is conservative and safe, and it ensures:
- Low occlusion
- High precision
- Consistent behavior during audits

All points of interest must remain inside this radius.
Step 4 – Camera Placement and Coverage Diagram
With the radius defined:
- Place cameras on the floor plan
- Draw the coverage radius for each camera
Example of camera placement on the floor plan:

If coverage is not sufficient:
- Add more cameras
- Overlap coverage radii
Step 5 – Camera Type, Field of View, and Resolution Selection
Field of View (FOV) Selection
It is important to choose a camera with the correct field of view to cover the points of interest inside the coverage radius defined by the mounting height.
You should think of the FOV as the camera’s viewing angle within its coverage radius:

Field-of-view reference table
| Lens type | Approx. field of view | Typical use | Diagram |
|---|---|---|---|
| Fisheye | 180° – 360° | Wide entrances, central zones |  |
| Wide angle | 100° – 140° | Standard entrances, queues |  |
| Medium angle | 60° – 90° | Narrow / limited zones |  |
| Telephoto | < 60° | Specific cases |  |
📌 Each diagram represents:
- Coverage radius
- Field of view
- Effective covered area
Finally, on your floor plans:
- Adjust the camera field of view according to the lens type
- Verify that all points of interest are covered

In this example, all points of interest are covered using 1 fisheye camera and 3 wide-angle cameras.
Examples of well-placed cameras
| Camera type | Image | Description |
|---|---|---|
| Fisheye | 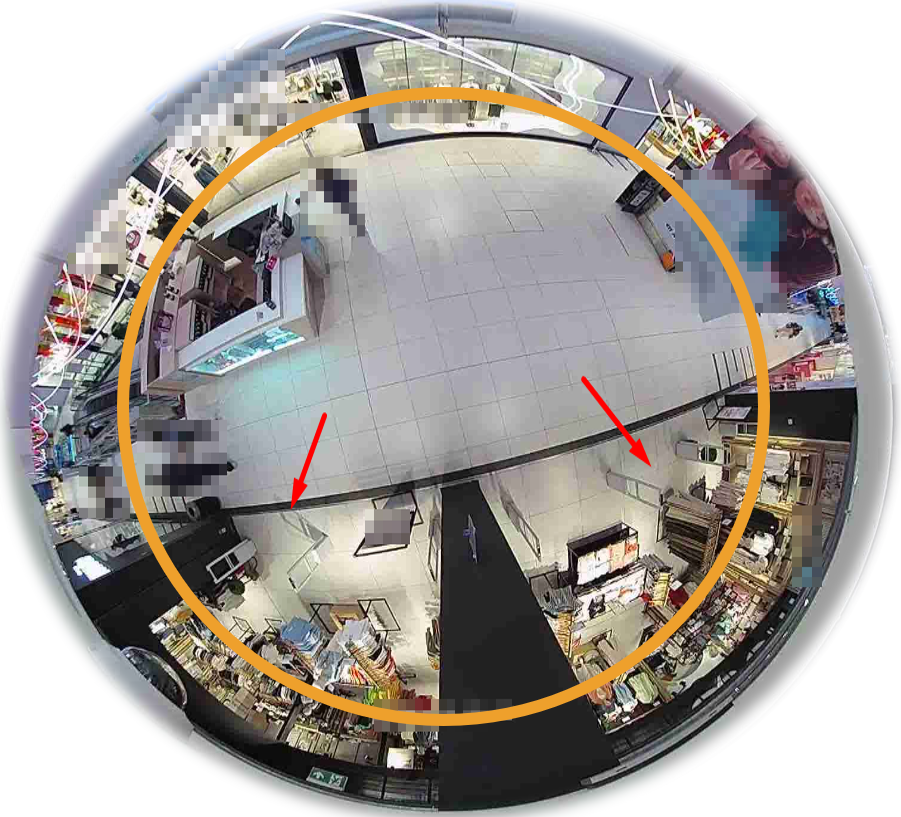 | Camera installed at ceiling height, full circular coverage, radius aligned with mounting height. Ideal for wide entrances or central zones. |
| Wide angle | 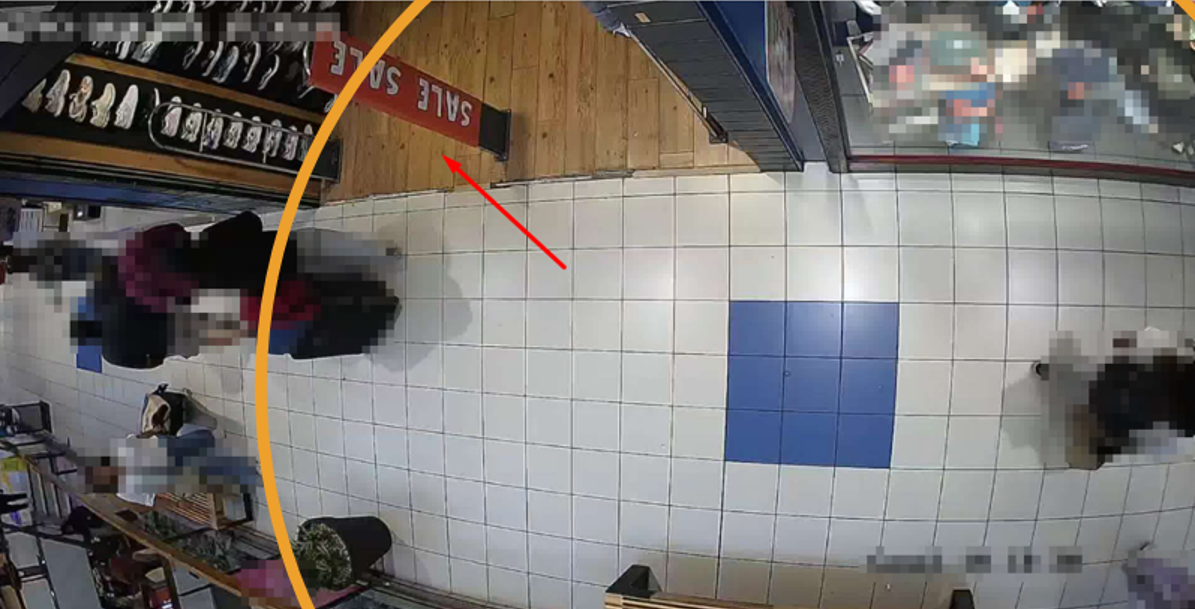 | Wide-angle camera aimed at a specific zone, coverage radius aligned with mounting height. Ideal for standard entrances or queues. |
Resolution
The key metric is not total resolution, but meeting:
👉 150 pixels per person
This requirement is met in most cases, even using medium or low resolution cameras, as long as:
- Mounting height is correct
- Field of view is appropriate
- Coverage radius is not exceeded
FPS (Frames per Second)
- Recommended optimal: 10 FPS
Lighting Management (Very Important)
If the area has natural light or direct sunlight, you must:
- Enable HCL, WDR, or HDR
- Adjust camera settings to avoid:
- Silhouettes
- Extreme contrast
- Loss of detail
📌 Poor lighting management can significantly reduce accuracy.
Step 6 – Feasibility Review
Before final installation:
- Review physical feasibility
- Assess occlusion risks
- Adjust placement if necessary
Placement may need changes due to:
- Columns
- Signage
- Real-world architecture constraints
Key Concepts
Occlusion
Occlusion occurs when people or objects block the camera view.
- It is the main cause of accuracy loss
- It affects all vision-based technologies
- It is significantly reduced with higher mounting heights
Why Height Matters
👉 Height removes occlusion
The higher the camera:
- The lower the probability of people blocking each other
- The more stable the counting performance
- The better the behavior during peak traffic periods
📌 Height is the most important factor for reliable analytics.
Reference Documentation (Official Standard)
👉 Camera Positioning Standard:
Validation Checklist
Before approving camera placement:
- Floor plans reviewed
- Mounting height confirmed
- Coverage radius = mounting height
- Points of interest covered
- Correct field of view selected
- Lighting management configured
- Occlusion risks evaluated
Following this standard ensures accurate, auditable, and scalable video analytics deployments in KSI VISION installations.